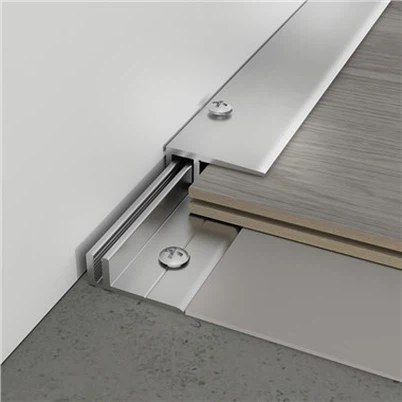
Bendable Curved Floor Trim Install: Flexible Arc Tips
Leave a message
Curved floors and rounded transitions present one of the most challenging installation scenarios in modern interior design. Whether you're working with architectural curves, rounded corners, or sweeping arcs, the right trim solution can transform a potential problem into a design feature.
This is where flexible aluminium tile trim becomes indispensable. Unlike rigid profiles that crack or gap when forced around curves, aluminium formable tile trim offers the flexibility and durability needed to create seamless, professional transitions on any curved surface.
In this comprehensive guide, we'll walk you through everything you need to know about installing bendable curved floor trim-from material selection to final finishing touches.
5 steps Installation of Flexible Aluminium Tile Trim

Step 1: Prepare the Surface
A well-prepared surface is crucial for successful flexible aluminium tile trim installation.
Surface preparation checklist:
✓ Clean the area thoroughly-remove dust, debris, and old adhesive
✓ Ensure the surface is dry (moisture can prevent adhesive bonding)
✓ Check for any gaps or irregularities larger than 3mm
✓ Sand any rough edges that might interfere with trim placement
✓ Verify that tiles are properly set and cured (minimum 24 hours)
For curved surfaces, pay special attention to the gap between the tile edge and the wall or floor. Inconsistent gaps will make it difficult to position your aluminium formable tile trim smoothly.
Step 2: Dry-Fit the Trim
Before applying any adhesive, perform a complete dry-fit of your flexible aluminium tile trim.
Dry-fit procedure:
- Position the trim along the entire curve without adhesive
- Check for gaps and alignment
- Identify any areas where the trim doesn't sit flush
- Mark any sections that need adjustment
- Test the bend at several points along the curve
This step is critical. It allows you to identify problems before adhesive is applied and gives you a chance to adjust your approach if needed.
Step 3: Apply Adhesive
Proper adhesive application is essential for long-term durability of your flexible aluminium tile trim.
Adhesive application technique:
- Use a flexible polyurethane adhesive designed for tile trim
- Apply a continuous bead along the back of the trim (not the surface)
- For curved applications, apply slightly more adhesive than you would for straight trim
- Ensure even coverage along the entire length
- Pro tip: For aluminium formable tile trim on tight curves, consider applying adhesive to both the trim and the substrate for maximum hold.
Step 4: Position and Secure the Trim
This is where patience and technique matter most.
Positioning technique for curved trim:
- Start at the center of the curve (the point of greatest bend)
- Press the trim firmly into position, working outward toward both ends
- Use a rubber mallet to gently tap the trim into place
- Avoid sudden force-let the flexible aluminium tile trim gradually conform to the curve
- Check alignment frequently as you progress
Securing the trim during curing:
- Use clamps, weights, or painter's tape to hold the trim in position
- For curved applications, use multiple points of contact
- Ensure pressure is even to prevent the trim from shifting
- Leave in place for the full curing time (typically 24-48 hours)
Step 5: Fill Gaps and Seal
Once the adhesive has cured, it's time to address any gaps and create a watertight seal.
Gap filling process:
- Inspect the entire length of the flexible aluminium tile trim for gaps
- For gaps larger than 2mm, use a flexible caulk or grout
- Apply in a continuous bead, smoothing with a wet finger
- For smaller gaps, a flexible sealant may be sufficient
Sealing recommendations:
- Use a flexible, waterproof sealant designed for tile applications
- Silicone-based sealants offer excellent flexibility
- Polyurethane sealants provide superior durability
- For high-moisture areas, use a mold-resistant formula
Common Installation Challenges and Solutions
Challenge 1: Trim Won't Bend Smoothly
Symptoms: Gaps appear, trim buckles, or surface cracks
Solutions:
- Verify that your flexible aluminium tile trim is rated for your curve radius
- Apply more adhesive to help the trim conform to the surface
- Use gentle, consistent pressure rather than forcing the bend
- Consider pre-bending the trim before installation
- For very tight curves, use heat-forming techniques
Challenge 2: Adhesive Seeps Out
Symptoms: Excess adhesive visible along trim edges
Solutions:
- Use less adhesive on subsequent applications
- Choose a slower-setting adhesive that gives you more working time
- Wipe excess adhesive immediately with a damp cloth
- For flexible aluminium tile trim, apply adhesive only to the back surface
Challenge 3: Trim Shifts During Curing
Symptoms: Trim moves out of alignment before adhesive sets
Solutions:
- Increase clamping pressure and use more clamp points
- Use painter's tape to hold the trim in position
- Reduce foot traffic in the area during curing
- Choose a faster-setting adhesive if appropriate for your application
- For aluminium formable tile trim, ensure the surface is completely dry before installation
Challenge 4: Visible Gaps Remain
Symptoms: Gaps between trim and tile/floor after installation
Solutions:
- Use flexible caulk or grout to fill gaps larger than 2mm
- For flexible aluminium tile trim, ensure the substrate is smooth and even
- Consider using a backing rod for very large gaps
- Sand any rough tile edges that prevent proper trim seating

Understanding Flexible Aluminium Tile Trim
What Makes Aluminium Formable Tile Trim Different?
Flexible aluminium tile trim is engineered specifically for applications where standard rigid profiles won't work. The key difference lies in the material composition and manufacturing process.
Traditional tile trim is designed for straight applications. It's rigid, durable, and perfect for 90-degree corners and linear transitions. However, when you introduce curves-whether gentle arcs or tight radius bends-rigid trim becomes problematic.
Aluminium formable tile trim, by contrast, features:
- Flexible core material that bends without cracking or losing structural integrity
- Durable aluminium surface that maintains its finish and appearance
- Consistent thickness that ensures uniform transitions
- Easy bendability that allows field customization to match any curve radius
- This combination makes flexible aluminium tile trim the professional choice for curved floor installations.
Ready to transform your curved surfaces? Explore our full range of flexible aluminium tile trim solutions and discover why professionals trust Hero Metal for their most challenging installations.