How to Trim Tiles After Installation for a Clean, Professional Finish
Leave a message
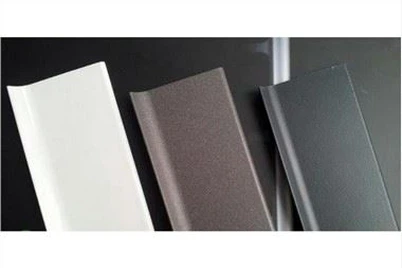
How to install metal tile trim after tiling?
Trimming tiles after they've been installed can be essential to perfecting the finish of your tiling project. Whether you need to cover rough edges, create smooth transitions, or add decorative accents, trimming can enhance the durability and aesthetic of the finished surface. In this guide, we'll walk you through the best ways to trim tiles after the tiling is complete, including the tools you'll need and the steps to follow.
Tools and Materials for Adding Tile Trim
Before you start, make sure you have the right tools:
- Tile Trim (your choice based on aesthetics and functionality)
- Adhesive (e.g., silicone or construction adhesive for bonding)
- Utility Knife or Hacksaw (to cut the trim to size)
- Level (for accuracy)
- Measuring Tape (to ensure proper alignment)
- Caulk Gun (for applying adhesive cleanly)
- Cleaning Supplies (to ensure surfaces are free of dust and grime before application)

Steps to Installing Tile Trim
1. Measure and Cut the Trim
Measure the length of the edge where the trim will be placed. Mark the trim and use a hacksaw or utility knife to cut it to the required length. If using metal trims, a hacksaw is ideal for clean, precise cuts. For PVC, a utility knife will suffice.
2. Prepare the Tile Edge
Ensure the tile edges are smooth and free from grout or adhesive residue. Clean the edges of the tiles and the wall or floor to remove any dust, dirt, or moisture. If the tile edges are uneven, use a grinder or tile cutter to smooth them out before applying the trim(refer:https://www.tilersforums.com/)
3. Apply the Adhesive
For adhesive trims, apply a thin, even layer of silicone or construction adhesive to the back of the trim using a caulk gun. Be sure to choose an adhesive that is suitable for your tile type and the environment (e.g., waterproof adhesives for bathrooms or kitchens).
4. Attach the Trim
Carefully press the trim onto the edge of the tiles, ensuring it aligns perfectly. For added precision, use a level to make sure the trim is straight. Hold it in place for a few seconds or use masking tape to temporarily secure the trim while the adhesive (refer: flooringclarity.com)
5. Clean Up Excess Adhesive
Wipe away any excess adhesive with a damp cloth before it dries. This will ensure a neat finish and prevent any adhesive from hardening on the surface.
6. Seal and Grout
Once the adhesive has dried and the trim is securely in place, seal the edges with grout or caulk. This step ensures that the trim is fully sealed against moisture and helps to give the edges a finished lookmakingmanzanita.comtilersforums.com.
7. Allow Adhesive to Cure
Give the adhesive time to cure fully according to the manufacturer's instructions. Avoid putting pressure on the trim during this time to ensure a secure bond.
Video Guide: How to Trim Tile After Tiling
For visual learners, watching a video can be immensely helpful. Here's a quick step-by-step video guide on how to trim tile after installation:
HERO METAL(HERO DECOR), a trusted aluminum decor strip manufacturers, specializes in OEM production of tile trims, stair nosings, and custom extrusions. Reach us for product details or inquire high-value building trimming solutions.
Inquire Now To Secure Stable High-value Solutions
📞 +86 18520965422 | ✉ info@herometal.net | 🌐www.tiletrim.com
📍 Address: 1/8 Ruyi Road, Xiabai, Luocun, Nanhai, Foshan, Guangdong, China
© 2025 Hero Metal. All rights reserved.